Create Pieces
Domino defines standards for writing and distributing modular Pieces, which guarantees their reusability and consistency across Workflows. Those Pieces can be included in any Workflow by drag-and-drop, and Domino will take care of running them according to user choices.
It is very easy to turn your Python code into a Domino Piece, in this session we'll guide you through it, step by step:
- write your Python function inside the piece.py file
- define its data types inside the models.py file
- define extra metadata options inside the metadata.json file
- write tests for your Piece inside the test_mynewpiece.py file
- define its dependencies
- publish it in a git repository (public or private)
Let's create a new Piece, named MyNewPiece. The Piece's folder should have the same name as the Piece (in this case MyNewPiece) and follow a standard organization:
/MyNewPiece
..../metadata.json
..../models.py
..../piece.py
..../test_mynewpiece.py
piece.py
The piece.py file should contain your custom code inside the piece_function method. The class for the Piece we're writing is defined here, and it should inherit from Domino BasePiece. Example:
The class name should match the Piece's folder name, in this case MyNewPiece.
from domino.base_piece import BasePiece
from .models import InputModel, SecretsModel, OutputModel
from pathlib import Path

class MyNewPiece(BasePiece):

    # Your custom function code comes in here
    def piece_function(self, input_data: InputModel, secrets_data: SecretsModel):

        # The Piece's input arguments are passed in the 'input_data' argument
        print(f"Inpu argument 1: {input_data.in_argument_1}")
        print(f"Inpu argument 2: {input_data.in_argument_2}")
        print(f"Inpu argument 3: {input_data.in_argument_3}")

        # The Piece's secrets are passed in the 'secrets_data' argument
        print(f"Secret variable: {secrets_data.SECRET_VAR}")

        # If you want to save files in a shared storage, to be used by other Pieces,
        # you should save them under self.results_path
        msg = "This is a text to be saved in a shared storage, to be read by other Pieces!"
        file_path = str(Path(self.results_path)/"msg.txt")
        with open(file_path, "w") as f:
            f.write(msg)

        # If you want to display results directly in the Domino GUI,
        # you should set the attribute self.display_result
        self.display_result = {
            "file_type": "txt",
            "file_path": file_path
        }

        # You should return the results using the Output model
        return OutputModel(
            out_argument_1="a string result",
            out_file_path=file_path
        )
Save files in a shared storage
Pieces can save files in a shared storage, to be used as input to downstream Pieces, by saving them under self.results_path. The self.results_path points to a shared storage path specific for that Piece, and it is automatically created when the Piece is executed.
Important: To use this feature your workflow should be configured to use a shared storage.
msg = "This is a text to be saved in a shared storage, to be read by other Pieces!"
file_path = str(Path(self.results_path)/"msg.txt")
with open(file_path, "w") as f:
    f.write(msg)
Besides saving files under self.results_path, to make those files available as input to other Pieces, you should also return the file path in the OutputModel:
return OutputModel(
    out_argument_1="a string result",
    out_file_path=file_path
)
Display results in the Domino GUI
Pieces can display results directly in the Domino GUI, by setting the attribute self.display_result in one of two ways:
- Saving the result in a file, and passing the file path to the
self.display_resultattribute:
self.display_result = {
    "file_type": "txt",
    "file_path": file_path
}
- Passing the result content directly to the
self.display_resultattribute as a base64 encoded string:
self.display_result = {
    "file_type": "txt",
    "base64_content": base64-encoded-string,
}
In either way, the file_type should always be provided. Currently, the supported file types are:
txtjsonpngjpegbmptiffgifsvgmdpdfhtmlplotly_json
Display Logs
Domino BasePiece class has a built in logger property.
You can use it to log messages to the Domino GUI using the following:
self.logger.info("This is an info message")
models.py
The models.py file contains the data models for the Input, Output and Secrets arguments of the Piece. Those should be defined as Pydantic models. Example:
from pydantic import BaseModel, Field

class InputModel(BaseModel):
    """MyNewPiece Input"""
    in_argument_1: float = Field(
        default=1.,
        description="an argument of numeric type with default value",
    )
    in_argument_2: str = Field(
        description="a required argument of string type"
    )
    in_argument_3: bool = Field(
        description="a required argument of boolean type"
    )

class OutputModel(BaseModel):
    """MyNewPiece Output"""
    out_argument_1: str = Field(
        description="an argument of string type"
    )
    out_file_path: str = Field(
        description="The path to a file saved in a shared storage"
    )

class SecretsModel(BaseModel):
    """MyNewPiece Secrets"""
    SECRET_VAR: str = Field(
        description="Secret variable"
    )
Pydantic models are very powerful and rich in features. Using them properly will guarantee that your Piece will always be called with the correct input data types and that downstream Pieces will be able to use its output data as well. We can easily add informative descriptions, validation rules (e.g. regex for string type, min/max for numeric types) and make arguments required/optional using Pydantic models.
Based on the InputModel, the Domino GUI will appropriately display input fields in the forms, based on their respective data types:
InputModel
Optional inputs must be assigned a default value, and it is essential to explicitly specify the default value, even if it is set to 'None'.
Basic inputs:
For all basic inputs, you have the option to use the tag from_upstream with values "always", "never", or "allowed" If left unset, Domino will interpret it as "allowed" by default.
input_string: str = Field(
    description='Input string required.'
    json_schema_extra={
        'from_upstream':'allowed' # 'always', 'never' or 'allowed'.
    }
)
String
- Pydantic
- JSON schema
- Form
input_string: str = Field(
    description='Input string required.'
)
input_string_optional: Optional[str] = Field(
    default=None,
    description='Input string with default=None.'
)
You can also use widget property with value codeeditor-{lenguage} or textarea to render other input types.
input_textarea: Optional[str] = Field(
    default="Lorem ipsum",
    description='input_textarea not required string.',
    json_schema_extra={
        'widget':"textarea",
    }
)
input_code: str = Field(
    description='input_code string with default.',
    json_schema_extra={
        'widget': "codeeditor",
    }
)
The JSON Schema will ge generated automatically by domino. This content is just a reference.
{
    "input_string_required": {
        "description": "input_string required string.",
        "title": "Input String",
        "type": "string"
    }
}
{
    "input_string_optional":{
        "anyOf": [
            {
            "type": "string"
            },
            {
            "type": "null"
            }
        ],
        "default": null,
        "description": "Input enum with default=None.",
        "title": "Input String Optional"
    }
}
{
    "input_text_area_optional": {
        "anyOf": [
            {
            "type": "string"
            },
            {
            "type": "null"
            }
        ],
        "description": "input_textarea not required string.",
        "title": "Input Textarea",
        "widget": "textarea"
    },
    "input_code": {
        "default": "print('Hello world!')",
        "description": "input_code string with default.",
        "title": "Input Code",
        "type": "string",
        "widget": "codeeditor"
    }
}


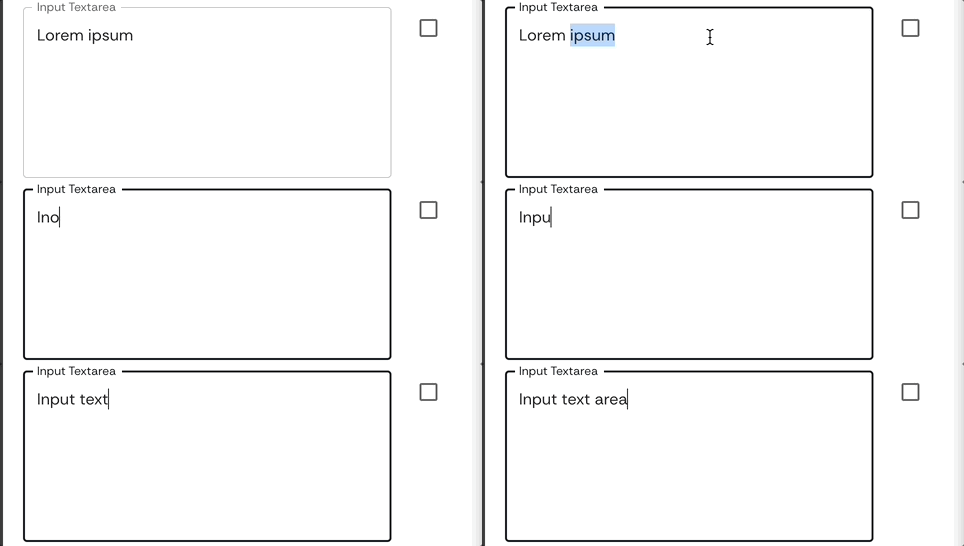
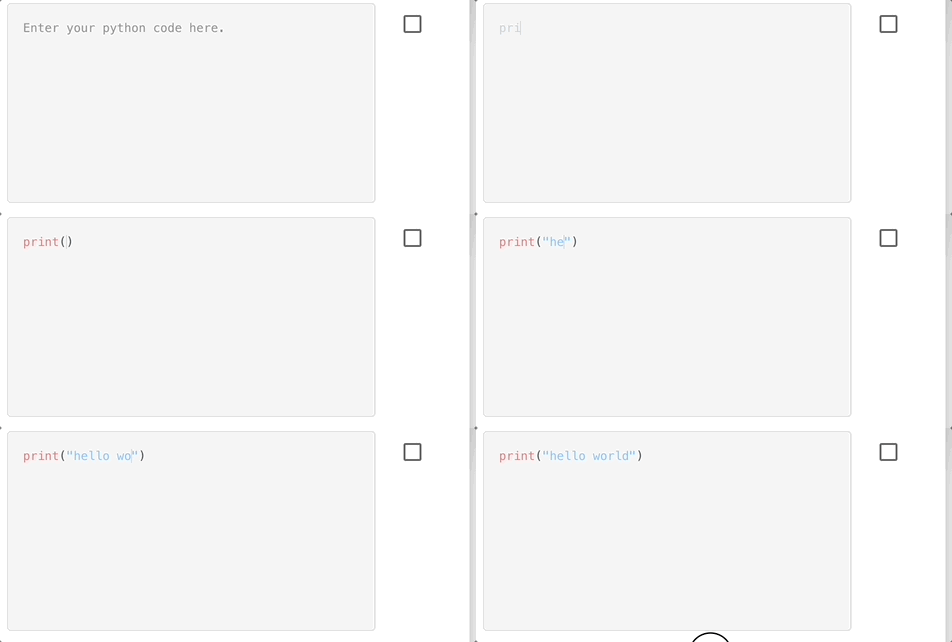
Integer
- Pydantic
- JSON schema
- Form
    input_integer: int = Field(
      description="Input integer required."
    )
    input_integer_optional: Optional[int] = Field(
      default=None,
      description="Input integer optional."
    )
The JSON Schema will ge generated automatically by domino. This content is just a reference.
{
    "input_integer": {
        "description": "input_integer required integer.",
        "title": "Input Integer",
        "type": "integer"
    }
}
{
    "input_integer_optional": {
        "anyOf": [
            {
            "type": "integer"
            },
            {
            "type": "null"
            }
        ],
        "default": null,
        "description": "Input enum with default=None.",
        "title": "Input Integer Optional"
    }
}


Float
- Pydantic
- JSON schema
- Form
input_float: float = Field(
    description='Input float required.'
)
input_float_optional: Optional[float] = Field(
    default=None,
    description='Input float with default=None.'
)
The JSON Schema will ge generated automatically by domino. This content is just a reference.
{
    "input_float_required": {
        "description": "Input float required.",
        "title": "Input Float",
        "type": "number"
    }
}
{
    "input_float_optional":{
        "anyOf": [
            {
            "type": "number"
            },
            {
            "type": "null"
            }
        ],
        "default": null,
        "description": "Input float with default=None.",
        "title": "Input Float Optional"
    }
}


Boolean
- Pydantic
- JSON schema
- Form
Boolean types must be provided with a default value of either 'True' or 'False'. The use of Optional[bool] will not be accepted as an input.
input_boolean: bool = Field(
    default=False
    description="Example of boolean input argument"
)
The JSON Schema will ge generated automatically by domino. This content is just a reference.
{
    "input_boolean": {
      "default": false,
      "description": "Example of boolean input argument",
      "title": "Input Boolean",
      "type": "boolean"
    }
}

Advanced inputs
Exepct for Enum, all advanced inputs can also use from_upstream. Object arrays can also use from_upstream for each individual sub-input.
Array inputs need a default value, even if is a empty array.
Date/Time
- Pydantic
- JSON schema
- Form
from datetime import datetime, time, date

input_datetime: datetime = Field(
    description='input_datetime string.'
)

input_time: time = Field(
    description='input_time string.'
)

input_date: date = Field(
    description='input_date string.'
)
from typing import Optional
from datetime import datetime, time, date

input_datetime: Optional[datetime] = Field(
    default=None,
    description='input_datetime string.'
)

input_time: Optional[time] = Field(
    default=None,
    description='input_time string.'
)

input_date: Optional[date] = Field(
    default=None,
    description='input_date string.'
)
The JSON Schema will ge generated automatically by domino. This content is just a reference.
{
    "input_date": {
      "description": "Input date to be logged.",
      "format": "date",
      "title": "Input Date",
      "type": "string"
    },
    "input_time": {
      "description": "Input time to be logged.",
      "format": "time",
      "title": "Input Time",
      "type": "string"
    },
    "input_datetime": {
      "description": "Input datetime to be logged.",
      "format": "date-time",
      "title": "Input Datetime",
      "type": "string"
    }
}
{
    "input_date": {
      "default": null,
      "description": "Input date to be logged.",
      "format": "date",
      "title": "Input Date",
      "type": "string"
    },
    "input_time": {
      "default": null,
      "description": "Input time to be logged.",
      "format": "time",
      "title": "Input Time",
      "type": "string"
    },
    "input_datetime": {
      "default": null,
      "description": "Input datetime to be logged.",
      "format": "date-time",
      "title": "Input Datetime",
      "type": "string"
    }
}
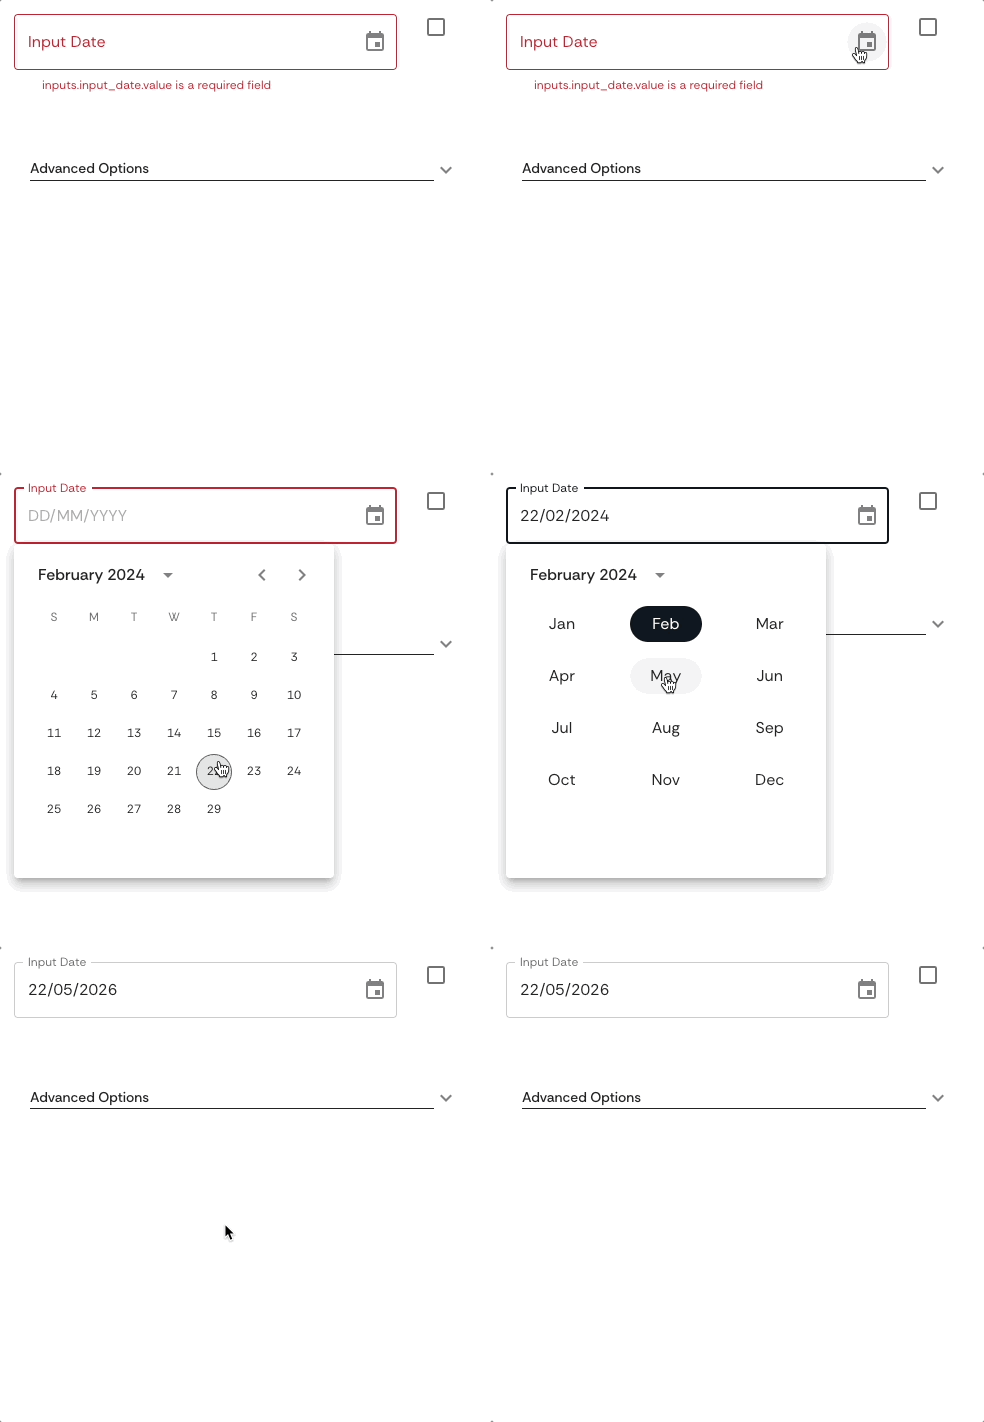
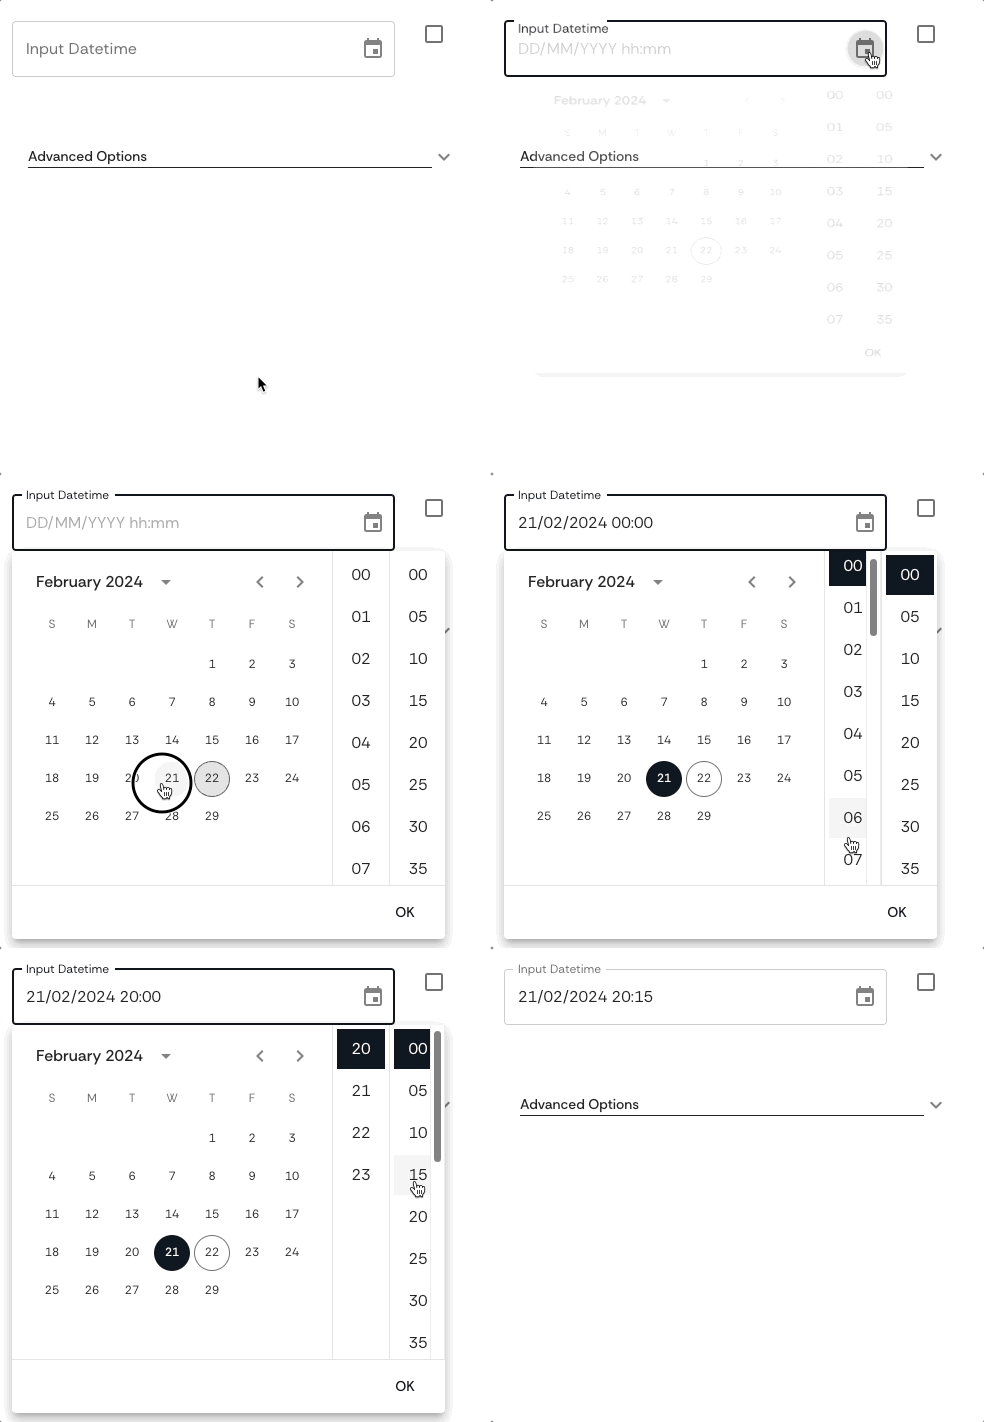
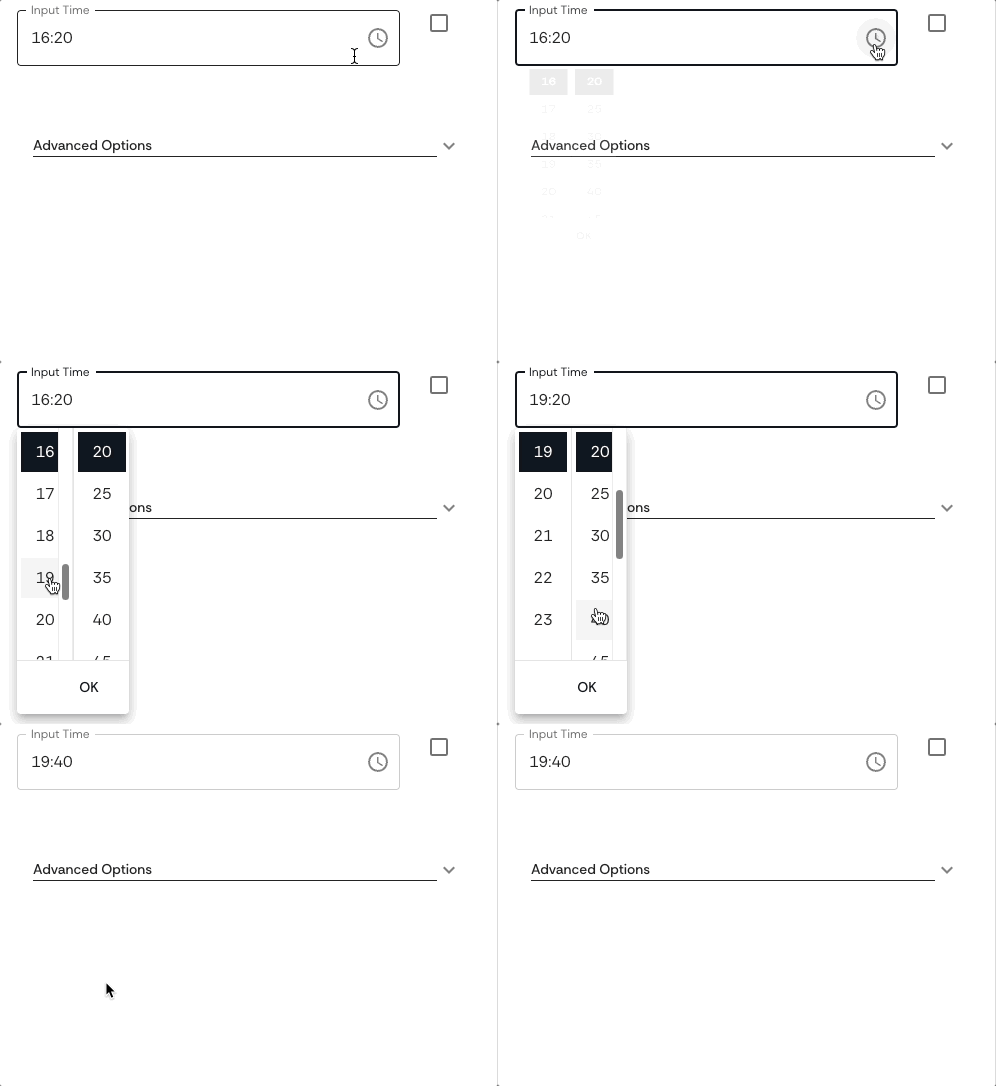
Enum
- Pydantic
- JSON schema
- Form
You must first create an Enum class with its corresponding options in the models.py, then use this class as a type.
Enum type cannot be from_upstream.
from enum import Enum

class EnumType(str, Enum):
    option_1 = "option_1"
    option_2 = "option_2"
    option_3 = "option_3"

enum_input: EnumType = Field(
    default=EnumType.option_1,
    description="Example of enum input argument"
)
The JSON Schema will ge generated automatically by domino. This content is just a reference.
{
    "$defs": {
        "InputEnum": {
            "enum": [
                "option1",
                "option2",
                "option3"
            ],
            "title": "InputEnum",
            "type": "string"
        }
    },
    "properties":{
        "input_enum": {
            "allOf": [
                {
                    "$ref": "#/$defs/InputEnum"
                }
            ],
            "default": "option1",
            "description": "Input enum to be logged."
        }
    }
}
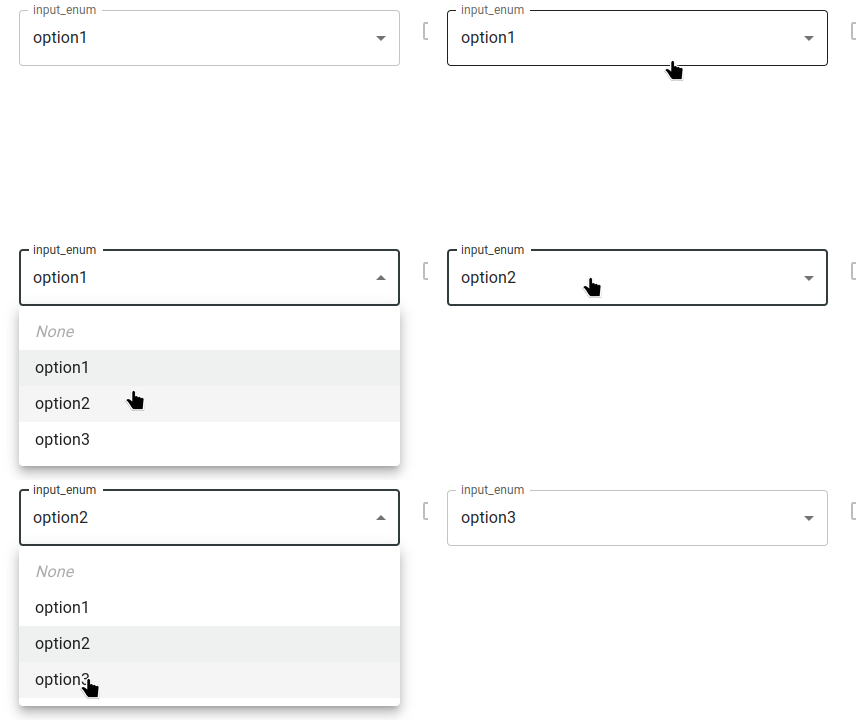
Simple Array
- Pydantic
- JSON schema
- Form
Simple arrays need a default value, even if is a empty array.
input_array: List[str] = Field(
    default= [
        "default_1",
        "default_2",
        "default_3"
    ],
    description='Input array to be logged.'
)
The JSON Schema will ge generated automatically by domino. This content is just a reference.
{
    "input_array":{
        "default": [
            "default_1",
            "default_2",
            "default_3"
        ],
        "description": "Input array to be logged.",
        "items": {
            "type": "string"
        },
        "title": "Input Array String",
        "type": "array"
    }
}
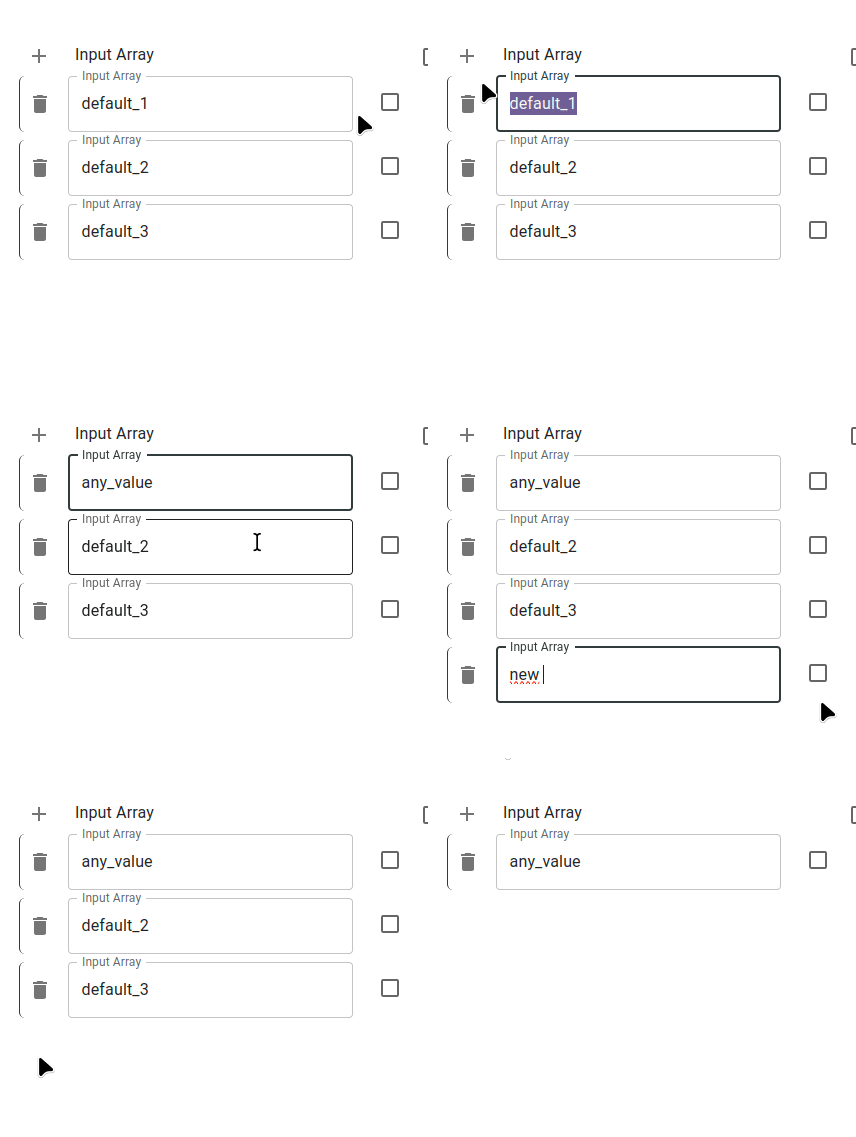
Object Array
- Pydantic
- JSON schema
- Form
For Object Arrays you need define the basic model first, and use this model in a array as usual. Each element of this object can be configured as from_upstream never | always | allowed
from pydantic import BaseModel, Field
from typing import List, Optional

class InputModel(BaseModel):
    item_1: str = Field(
        description='Argument one.',
        json_schema_extra={
            'from_upstream':'never'
        }
    )
    item_2: Optional[str] = Field(
        description='Argument two.',
        json_schema_extra={
            'from_upstream':'allowed'
        }
    )
    item_3: str = Field(
        description='Argument two.',
        json_schema_extra={
            'from_upstream':'always'
        }
    )
input_args: List[InputModel] = Field(
        default=[],
        description='Input arguments.',
        json_schema_extra={
            'from_upstream':'never'
        }
    )
The JSON Schema will ge generated automatically by domino. This content is just a reference.
{
    "$defs":{
        "InputObject": {
            "properties": {
                "item_1": {
                    "from_upstream": "never",
                    "description": "Argument name.",
                    "title": "Item1",
                    "type": "string"
                },
                "item_2": {
                    "from_upstream": "allowed",
                    "description": "Argument name.",
                    "title": "Item2",
                    "type": "string"
                },
                "item_3": {
                    "from_upstream": "always",
                    "description": "Argument name.",
                    "title": "Item3",
                    "type": "string"
                }
            },
            "from_upstream": "never"
      },
      "title": "InputObject",
      "type": "object"
    },
    "properties":{
        "input_array_object": {
            "default": [],
            "items": {
                "$ref": "#/$defs/InputObject"
            },
            "title": "Input Array Object",
            "type": "array"
        }
    }
}
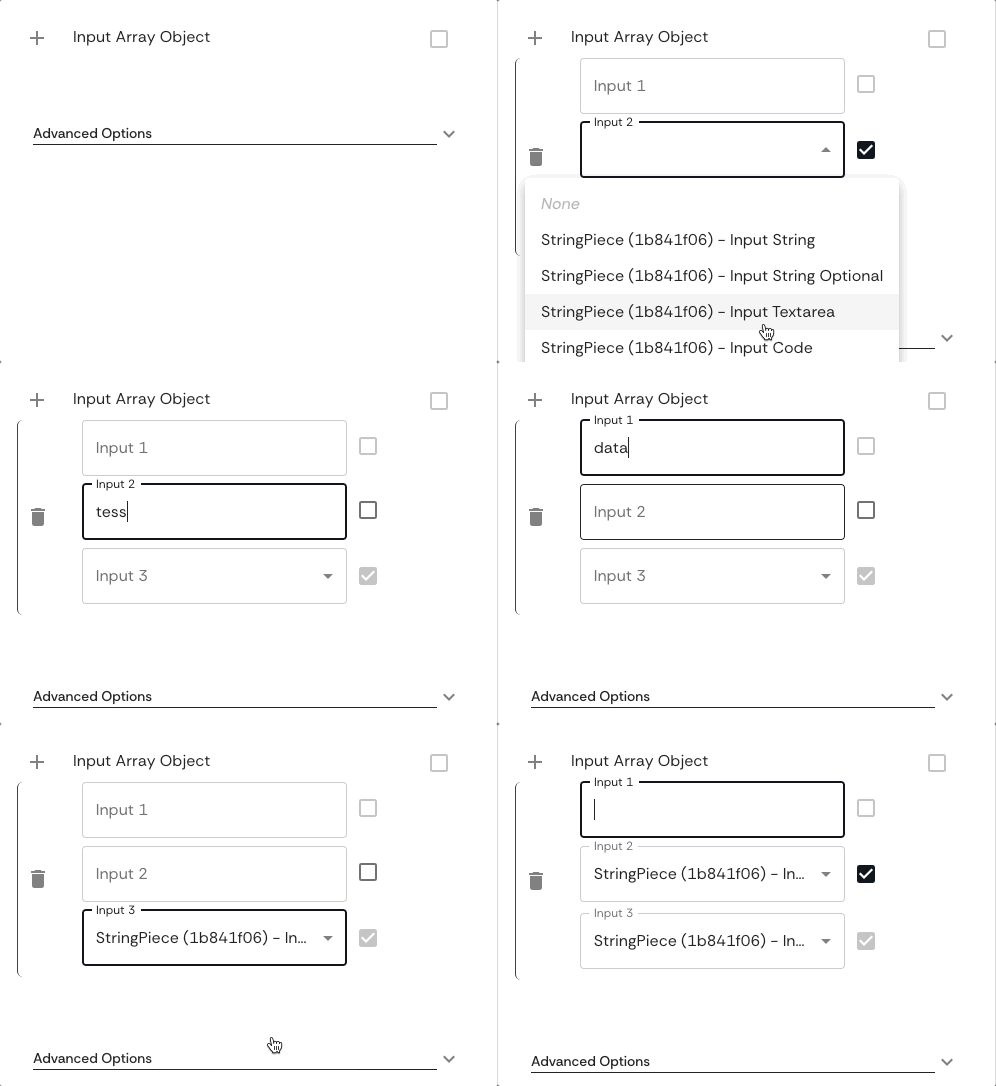
OutputModel
The OutputModel defines the output data types of the Piece and allows for connected downstream Pieces to use this output data correctly.
SecretsModel
The SecretsModel defines the secret variables that should be available to the Piece function. It is important to note that Secrets arguments names should be unique within the same Pieces repository. If the same name is used for more than one Secret argument in the same repository, Domino presumes that both Pieces are using the same secret value (e.g. the same access token to an external service).
metadata.json
The simplest metadata.json file should contain basic metadata related to the Piece:
{
    "name": "MyNewPiece",
    "description": "This Piece runs my awesome Python function, in any Workflow!",
    "dependency": {
        "requirements_file": "requirements_0.txt"

}
The name field is the official Piece's name and it should match the name of the folder and of the class.
The description field should contain a short and useful description of your Piece.
The dependency field contains the reference to a dependencies file that is required to run your custom code. It can contain either:
requirements_file, with the name of a Python requirements file.dockerfile, with the name of a Dockerfile with instructions to build the Docker image serving this Piece
The dependency files are stored in a separate folder inside the Pieces repository.
Optionally, you can also include in the metadata:
- style configurations for the visual node representing
MyNewPiecein the Domino GUI, such as label and icon. Currently the available icons are the free options from Font Awesome v5. - minimal and limit resources required to run the Piece, when running Domino in Kubernetes. The units are millicores (m) for CPU and mebibyte (Mi) for memory.
- a list of tags
{
    "name": "MyNewPiece",
    "description": "This Piece runs my awesome Python function, in any Workflow!",
    "dependency": {
        "requirements_file": "requirements_0.txt"
    },
    "container_resources": {
        "requests": {
            "cpu": 100,
            "memory": 128
        },
        "limits": {
            "cpu": 500,
            "memory": 512
        }
    },
    "style": {
        "node_label": "My awesome Piece",
        "icon_class_name": "fas fa-database"
    },
    "tags": [
        "Awesome",
        "New"
    ]
}
test_mynewpiece.py
To guarantee that your Piece is working as expected, you should always write tests for it. You can name the test file as you desire, as long as it starts with test_ and is unique among the other test files in the same repository, e.g. test_mynewpiece.py.
from domino.testing import piece_dry_run

def test_mynewpiece():
    # Define input and secrets data
    input_data = dict(
        in_argument_1=10.5,
        in_argument_2='test string',
        in_argument_3=True,
    )
    secrets_data = dict(
        SECRET_VAR="secret_value"
    )

    # Dry-run the Piece
    piece_output = piece_dry_run(
        piece_name="MyNewPiece",
        input_data=input_data,
        secrets_data=secrets_data
    )

    # Compare the output with the expected output
    assert piece_output["out_argument_1"] == "a string result"
    assert piece_output["out_argument_2"].split("/")[-1] == "msg.txt"
All tests files will be automatically run by the repository's actions before the Pieces production images are released.
Add the Piece to a repository
Now that you have your new Piece ready, you need to add it to a Pieces repository so it could be installed in a Domino workspace.